All for Joomla All for Webmasters
Browsing Tag

Our Home

Our Home

Painted Mason Jars

We made (Pinterest-inspired) painted mason jar centerpieces for my sister-in-law’s baby shower. These painted mason jars are easy to make and look so good. I am obsessed and continued spray painting all the glass items I had in my house. It was mid-February and the temperature was like 65 degrees so thankfully we were able to do them outside.


These are great for shower centerpieces or home decor. After seeing how great they looked, I ended up making some for around my house. Here are the step by step instructions!

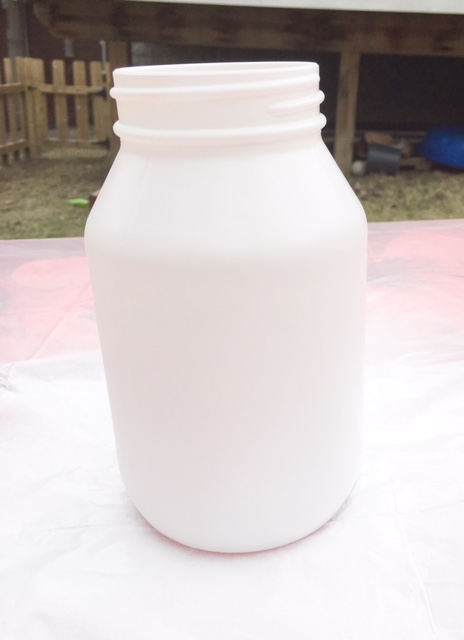
Step 1: Start with any clear glass item.

Step 2: Spray paint your base color. Take your time spray painting. It is best to do several light coats otherwise it will be runny and uneven. Patience! Speaking from experience, be aware of the direction the wind is blowing.

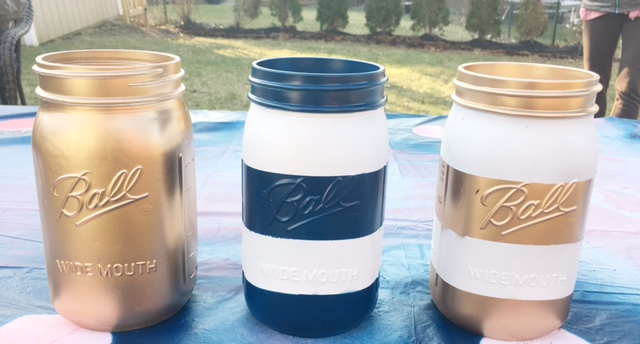
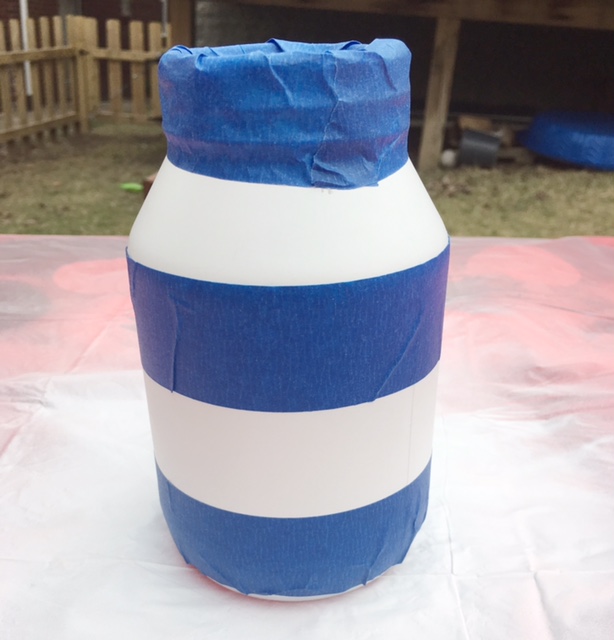
Step 3: Put painters tape on the dry jar to protect the areas you want to keep white. Be sure to run your fingers around all the edges of the tape and press it down to avoid paint running under the tape. Putting the tape on straight can be challenging. It helps if you are working with a jar that has markings to use as a guide. When we did the centerpieces the jars had markings and when I did it myself I used a plain jar. It was much more challenging to get straight lines with the plain glass jar.

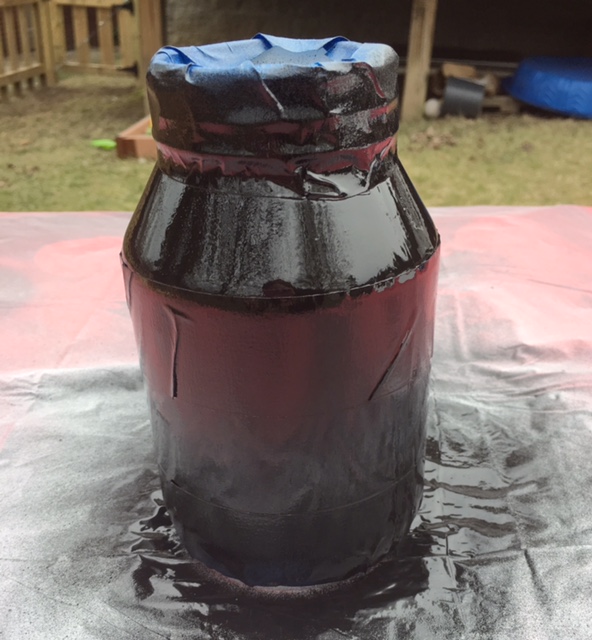
Step 4: Spray paint the opposite color. Go easy with the spray paint, put it on light, and move slowly. This is the most delicate part of the project because you don’t want the black paint to run down behind the tape onto the white. Now wait for the black paint to dry.

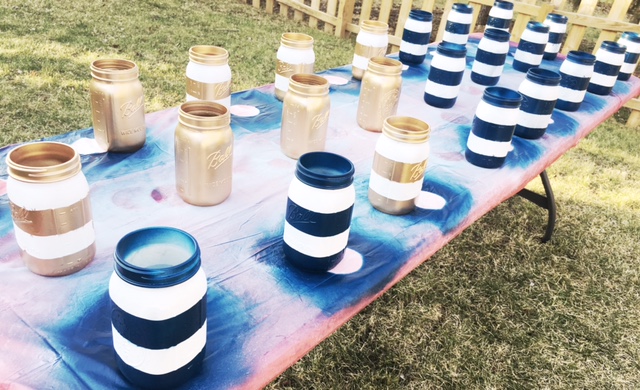
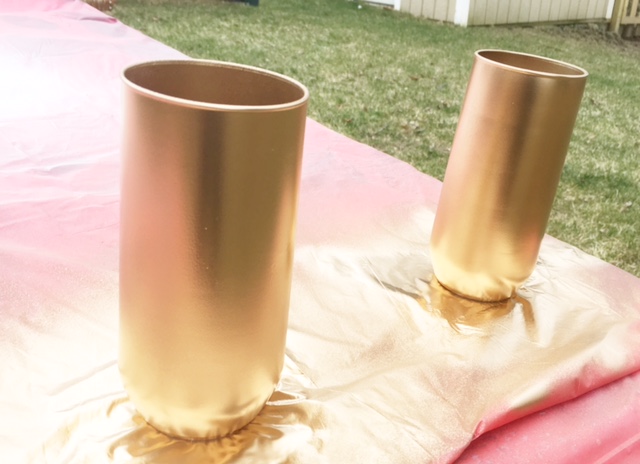
Step 5: Spray paint all the items you own with this awesome gold color until nap time is over!

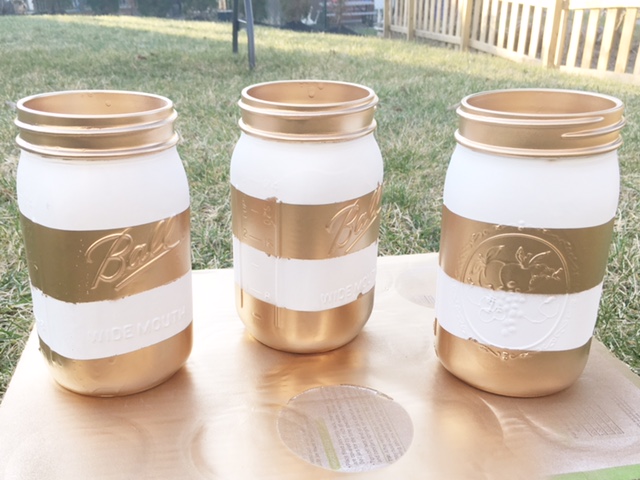
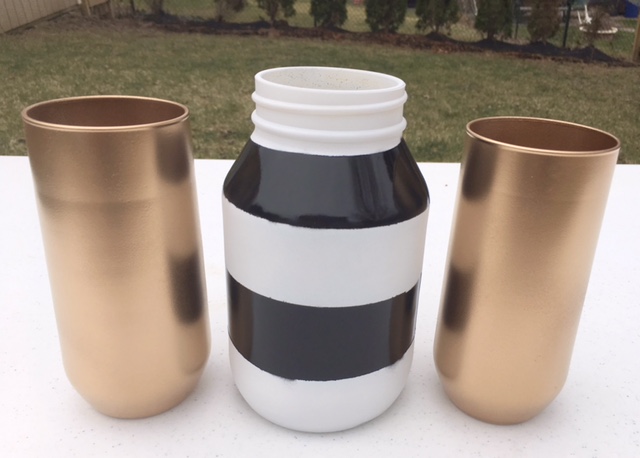
Step 6: Gently remove the painters tape and you are done! Looks awesome, right?!

Let me know if you try this painted mason jar project. I want to see how yours come out and your end use for them!

Our Home Slider Posts

DIY – Entryway Coat Hanger & Shelf

Our entryway and living room are getting a makeover! Our front door opens up into our formal living room. I am working on creating a ‘hallway’ to make the entrance way more functional and set apart the living room to be more cozy and comfortable. Stay tuned for the full transformation! Today I am sharing one of the first major pieces of this project.

I have wanted a cute entryway coat hanger & shelf for a long time. Even though we have a hall closet all of our stuff ends up right inside the door on the couch or on the floor. This project is practical but also I love the look of them. I searched for them at various stores and on Etsy and they were super expensive. I decided to try to tackle this project on my own!

I found step by step instructions on Pinterest here. I left the kids with my mom and headed to Lowes. I found the lumber I needed but had no idea how I was supposed to walk around the store and get my other items with a couple of 8 foot pieces of lumber in my arms. I spotted these carts that looked like they were made for this and later realized I had my lumber on the cart incorrectly. It didn’t take long for me to realize I was in over my head on this one!

I did my best to continue finding my supplies. As I wondered around Lowes lost and confused an older man asked, “Do you have any idea what you are doing?”. I smiled and he said, “Watching too much t.v., huh?”…so I guess it was obvious I had no idea what I was doing but I was determined to make this happen!

I took my supplies back to my parents house and ran it all past my dad. I had a few things wrong so we went back out together and got the proper items. At that point, I had my dad interested and thank goodness he was because this project was beyond my carpentry skills. If you read the comments below the instruction page you can see most people had trouble making the cuts on the crown molding. Thankfully my dad was able to do this for me.

unfinished

We ended up choosing crown molding with a more unique design than what’s shown in the instructions. It dressed it up a bit and gave it a more formal look.

fullsizerender_2fullsizerender_3

This is a big heavy piece so make sure you have a plan for where and how to hang it before you go to the trouble to make it. You need to hit studs and you want to do so behind the hooks. Figuring this out was like a SAT math problem…thankfully my husband is good at math. We were able to hit two studs on the first and fifth hook.

fullsizerender_1


fullsizerender-3

I LOVE the way this turned out! It cost about $80 to make…much cheaper than the ones I saw for sell for hundreds of dollars. BONUS: it’s another place in the house to display pictures!

I’ll post more about the entryway and living room makeover as we finish it. We are picking up a new couch tomorrow! For a sneak peak check out my pinterest board.